
Airtable is a flexible platform that combines the simplicity of a spreadsheet with the power of a database for easy data organization and collaboration.
Integrating your application with Airtable empowers you to create custom databases, streamline data management, and collaborate seamlessly with your team.
Authentication
Ensure you have the following information ready for a seamless integration process:
Connection Name: Select a descriptive name for your connection, like "MyAppAirtableIntegration". This helps in easily identifying the connection within your application or integration settings.Authentication Type: Airtable supports the following type of authentication for connecting to your Airtable account:
API Token
OAUTH 2.0
Access Token Based Authentication
Login into Airtable account and click on the profile icon at the top right corner.
Navigate to the builder hub
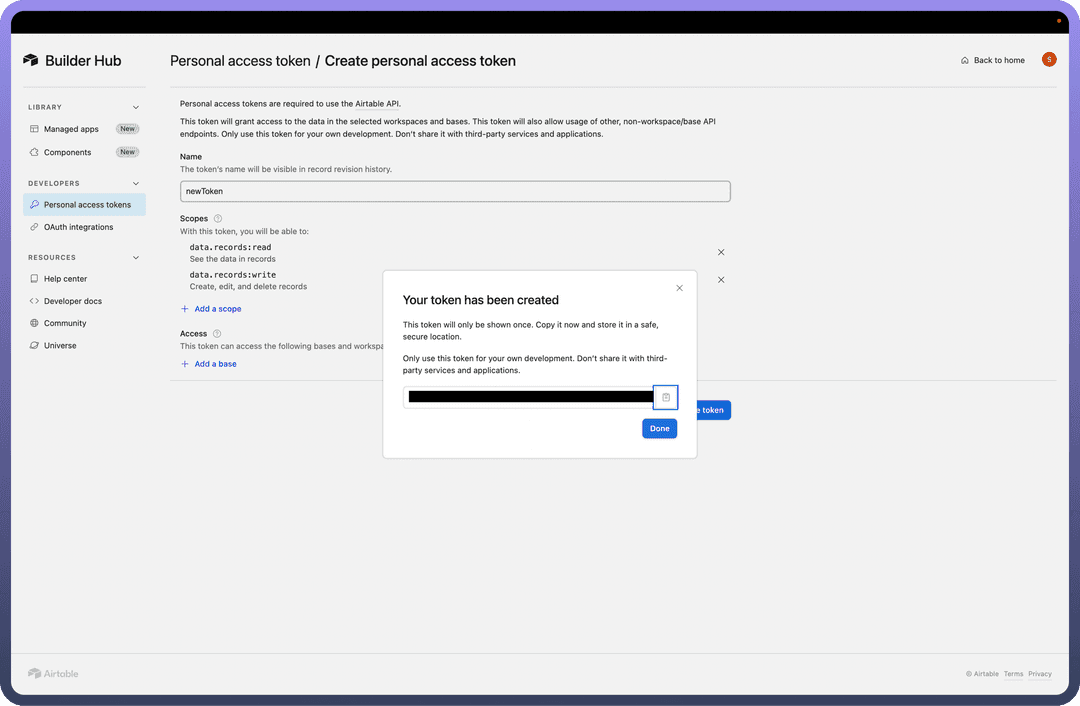
In Personal Access token section, click on the “
Create new token” buttonProvide the name and the required scopes for performing action based on your use case and click on “
Create Token”Treat this token with high confidentiality, as it allows access to your Airtable account.
OAUTH 2.0 Based Authentication
Login into Airtable account and click on the profile icon at the top right corner.
Navigate to the developer hub
In Oauth Integrations section, click on the “
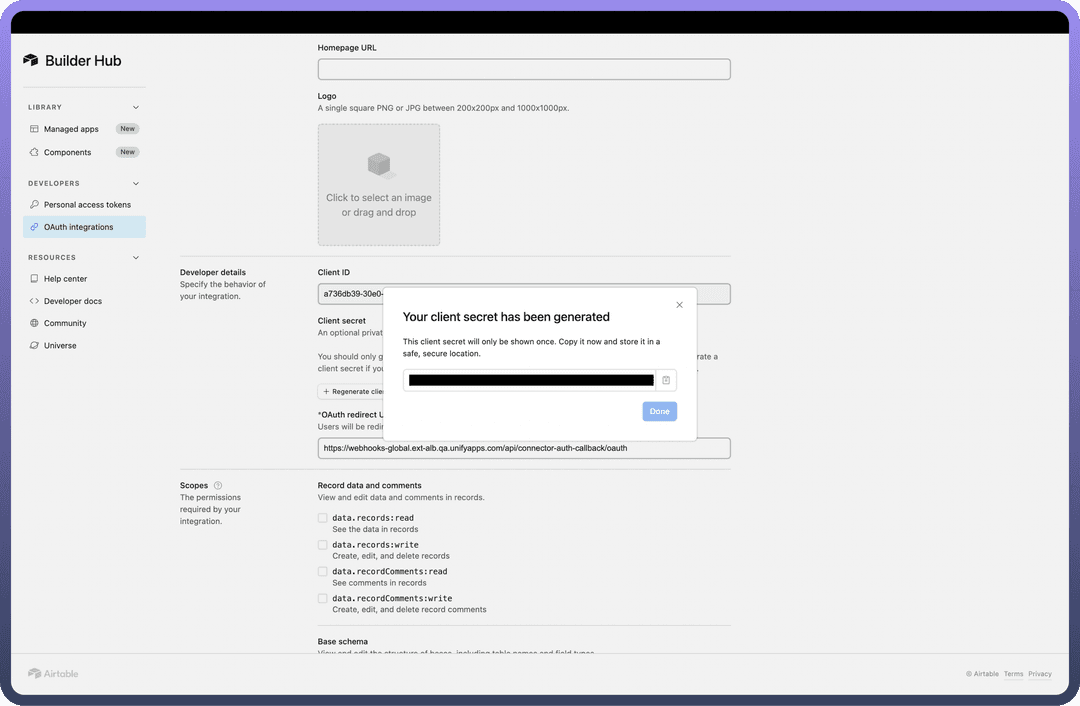
Register New OAuth integration” buttonProvide the “
Name” and the “OAuth Redirect URL” The OAuth Redirect URL is the destination to which users will be redirected after authorizing their integration.
Note
Use the following callback URL to complete the OAuth flow with UnifyApps. For example If you are accessing through qa.unifyapps.com the callback URL would be this: http://webhooks-golbal.ext-alb.qa.unifyapps.com/api/connector-auth-callback/oauth
Then click on the “
Register integration” buttonAfter registration fill out the details as mentioned, Note down the Client ID and also generate a client secret by clicking on the “
Generate client secret” and save it to form a connectionThen select the scopes you wish to expose through this connection
Actions
| Actions | Description |
Create comment | Create a comment on a record in Airtable |
Create field | Create field in Airtable |
Create record | Creates record in Airtable |
Delete comment | Delete a comment on a record in Airtable |
Delete multiple records | Delete multiple records in Airtable |
Delete record | Deletes record in Airtable |
Get record | Gets record from Airtable |
List records | List records in Airtable |
Search records | Search for records in Airtable |
Update comment | Update a comment on a record in Airtable |
Update field | Update field in Airtable |
Update record | Updates a record in Airtable |
Upsert record | Upsert a record in Airtable |
Upsert records (Batch) | Upsert records in Airtable |
Triggers
| Triggers | Description |
New record | This trigger will be invoked when a new record is created in Airtable |
New/Updated Record | This trigger will be invoked when a record is created or updated in Airtable |
Record and cell value changes | This trigger will be invoked when a record and cell value changes in Airtable |
Field change | Triggers when a field changes in Airtable |